

Vagrant is a tool that allows you to create sharable and reproducible development environments. Here's a complete overview of how to use it with your Ruby on Rails applications.
What is Vagrant?
To make development environments easy, Vagrant offers a way to encapsulate everything you need to run a specific application inside a virtual machine. Every developer will work using this same virtual machine that, in most cases, will be as close as possible to the production environment.
Even with your application running inside a virtual machine, you can simply edit the source code in local with your favorite editor and the changes are instantly reflected inside the virtual machine.
3 reasons to use Vagrant
Vagrant is a great tool to manage development environments. Here's why you should use it.
1. Isolation & Configuration
Isolate dependencies and configuration inside consistent environments.
2. Write Once, Reuse Everywhere
Once the Vagrant configuration is written for a project, there is nothing else to do for people who work on it. Simply get the project folder, run the vagrant command to generate the specified environment and that's it.
3. No more 'It works on my machine'
Vagrant can be used to generate exactly the same environment that is used in production. That means no more problems when developing on OS X and pushing to a Linux server. Just setup Vagrant to use the same Linux distribution than your production server and you'll be fine.
Install Vagrant
Installing Vagrant is quite easy. You will also need Virtual Box to run the virtual machines (there are other options available but Virtual Box is free).
- Vagrant: http://www.vagrantup.com/downloads
- Virtual Box: https://www.virtualbox.org/wiki/Downloads
That's all we need.
Create a sample Ruby on Rails application
To show you how simple it is to use Vagrant, we're going to generate a Ruby on Rails application.
rails new vagrant_jutsu && cd vagrant_jutsu
Now let's initialize Vagrant for this project. The following command will add a file named Vagrantfile where we can define the configuration for Vagrant.
vagrant init
Let's add a box!
Create a box
So first, what's a box? It's simply a virtual machine with a specific operating system that can be duplicated. When setting up Vagrant for a new project, the box specified in the configuration will be copied to create the virtual machine for your current project.
You can see a list of boxes available here: https://atlas.hashicorp.com/boxes/search
And we can easily add one with the following command. I have to warn you though, it's going to take a while.
vagrant box add ubuntu/trusty64
For this jutsu, I'm using an Ubuntu virtual machine as you can see in the command.
[
Update the Vagrant config
We're getting to the juicy part: the configuration! Vagrant comes with a lot of options so you can make it work the way you want.
Here's a basic configuration that you can use for this jutsu. You can find more details about the Vagrantfile configuration here.
In this one, we specify that we are using the box named ubuntu/trusty64 and that we want to bind anything running on port 3000 inside the virtual machine to the port 2000 on our host.
# -*- mode: ruby -*-
# vi: set ft=ruby :

Vagrant.configure(2) do |config|

  config.vm.box = "ubuntu/trusty64"
  config.vm.network "forwarded_port", guest: 3000, host: 2000

end
And it's as simple as that to get a running virtual machine. We'll add more stuff very soon to configure the VM automatically.
Provisioning & Starting
To start your virtual machine, you need to use the following command. If it's the first time you run it, it will also provision it.
vagrant up
Accessing your Vagrant box
Now that our virtual machine is running, we can actually access it! And it's super easy.
vagrant ssh
We're now inside the vm. The Ruby on Rails project is inside the /vagrant folder.
cd /vagrant
Provisioning with a script
The problem is that our vm is empty. We cannot start a rails server because we don't even have Ruby! That would be great if everything could be installed automatically... oh wait!
We just have to create a setup script to do this and tell Vagrant to run it when the virtual machine has been setup.
First, let's add the provision script file to the configuration.
# -*- mode: ruby -*-
# vi: set ft=ruby :

Vagrant.configure(2) do |config|

  config.vm.box = "ubuntu/trusty64"
  config.vm.network "forwarded_port", guest: 3000, host: 2000

  config.vm.provision "shell", path: "script.sh"
end
We're not going to do anything complicated, just install the following things:
- git
- libsqlite3-dev
- nodejs
- rvm
- rvm dependencies
- ruby
- the gems required for our project
Here's the script:
#!/bin/bash --login

cd /vagrant

sudo -E apt-get install git
sudo -E apt-get install libsqlite3-dev
sudo -E apt-get install nodejs

gpg --keyserver hkp://keys.gnupg.net --recv-keys 409B6B1796C275462A1703113804BB82D39DC0E3
\curl -sSL https://get.rvm.io | bash -s stable
source /usr/local/rvm/scripts/rvm

rvm requirements
rvm install 2.2.0

bundle install

echo "cd /vagrant" >> /home/vagrant/.bashrc
Now we can run vagrant provision to tell vagrant to re-run the setup of our vm. Our bootstrap script will be automatically run.
vagrant provision
Working with Vagrant
Once everything is setup, working with Vagrant is super easy. After checking out the project and running vagrant up, all you have to do is run vagrant ssh to connect to the virtual machine.
You can then do whatever you want and we're going to see this right now. First, let's start the rails server. Note that we need to bind it to 0.0.0.0 to be able to access it from the host machine.
rails s -b 0.0.0.0
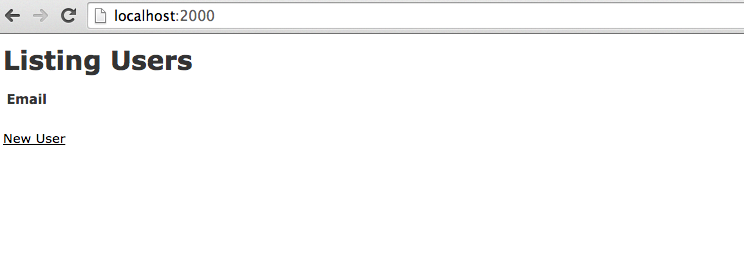
Let's take a look at our browser. Head over to http://localhost:2000 and you should see the default Rails view.
How about we do a bit of coding and see it synchronized automatically between our host and the virtual machine?
Let's scaffold a dumb user model. You'll have to run the following commands from inside the virtual machine (after vagrant ssh if you're not inside yet).
rails g scaffold user email:string
Followed by the migrations.
rake db:migrate
We have to edit the code now. You can just change it on your local machine using your favorite editor.
We need to define a root route:
Rails.application.routes.draw do
  resources :users
  root 'users#index'
end
And if we refresh the page, we can now see a default index page.
[
Removing a box
Just for your information, if you want to delete a virtual machine you can run the following command. It's easy to recreate one anyway with vagrant provision!
vagrant destroy
Source Code
You can check the source code for this jutsu at Github.
Conclusion
As you've seen throughout this jutsu, working with Vagrant won't change much of your workflow but it will provide a great way to be sure everyone has the same environment and that it's the closest possible to production.