
We earn commissions when you shop through the links below.
Table of Contents
- Why Consider Moving Now?
- What We're Assuming About Your App
- Why DigitalOcean App Platform?
- Before You Touch Anything: The Migration Checklist
- Steps to Migrate from Heroku to DigitalOcean App Platform
On February 6, 2026, Heroku officially announced it is transitioning to a "sustaining engineering model." In plain English: no new features, just keeping the lights on. For developers who have relied on Heroku for years, this is a signal worth paying attention to.
For many Rails developers, that marks the end of an era. When Ruby on Rails was thriving, Heroku was the default. It meant you didn’t have to configure nginx on an Ubuntu server just to ship.
If you're still on Heroku, now is a good time to plan your exit before something forces your hand.
This guide walks you through migrating a standard Rails app from Heroku to DigitalOcean App Platform , a fully managed PaaS with a similar push-to-deploy workflow.
Why Consider Moving Now?
Before we get into the migration steps, here’s a quick comparison between Heroku and DigitalOcean App Platform as of early 2026:
| DigitalOcean App Platform | Heroku | |
|---|---|---|
| Pricing model | Flat monthly pricing | Per-dyno + add-ons |
| Platform direction | Active development | Maintenance mode |
| Managed databases | Included & integrated | Add-ons (extra cost) |
| Bandwidth overage | $0.01/GiB flat rate | Higher at scale |
Heroku still works. But pricing becomes harder to predict as you scale, especially with add-ons and bandwidth. DigitalOcean App Platform keeps things simpler and more predictable, which is why it’s a practical landing spot if you're planning a migration.
What We're Assuming About Your App
This guide is written for a typical Rails setup:
- Your code lives in a GitHub repository
- You're using PostgreSQL as your database (hosted on Heroku)
- You're using Sidekiq and Redis for background jobs
- You have scheduled Rake tasks running via Heroku Scheduler
Even if your stack is slightly different, most of this still applies.
Why DigitalOcean App Platform?
DigitalOcean is straightforward, well-documented, and affordable, a natural landing spot for developers leaving Heroku.
App Platform is DigitalOcean's managed PaaS, and it's the closest thing to a Heroku replacement you'll find. It uses the same Cloud Native Buildpacks as Heroku, so most apps migrate with little to no code changes. You get fully managed PostgreSQL, MySQL, Redis, and MongoDB built in, free internal service routing between components (no Private Spaces fees), SSL provisioning, and zero-downtime deploys out of the box. You connect your GitHub repo, push code, and it deploys.
No servers to manage, no DevOps overhead, just your app running.
Before You Touch Anything: The Migration Checklist
Before setting up your new server, collect everything you need from Heroku and prepare the migration. Do this while your app is still running. For production apps, enable maintenance mode before exporting the database so no new data is written during the backup.
Most migrations run both platforms in parallel, then cut over at the DNS level once everything is confirmed stable. That's exactly the approach this guide follows, so downtime is minimal to zero.
On Heroku’s side:
- Export all config vars:
heroku config -a your-app-name - Dump your database:
heroku pg:backups:capture && heroku pg:backups:download - Note your custom domain (if any)
- Note all Heroku Scheduler tasks (command + schedule)
Steps to Migrate from Heroku to DigitalOcean App Platform
Create an App on DigitalOcean App Platform
Get started with DigitalOcean here .
Once you’re in, go to App Platform and create a new app. Connect your GitHub repository and choose the branch you want to deploy.
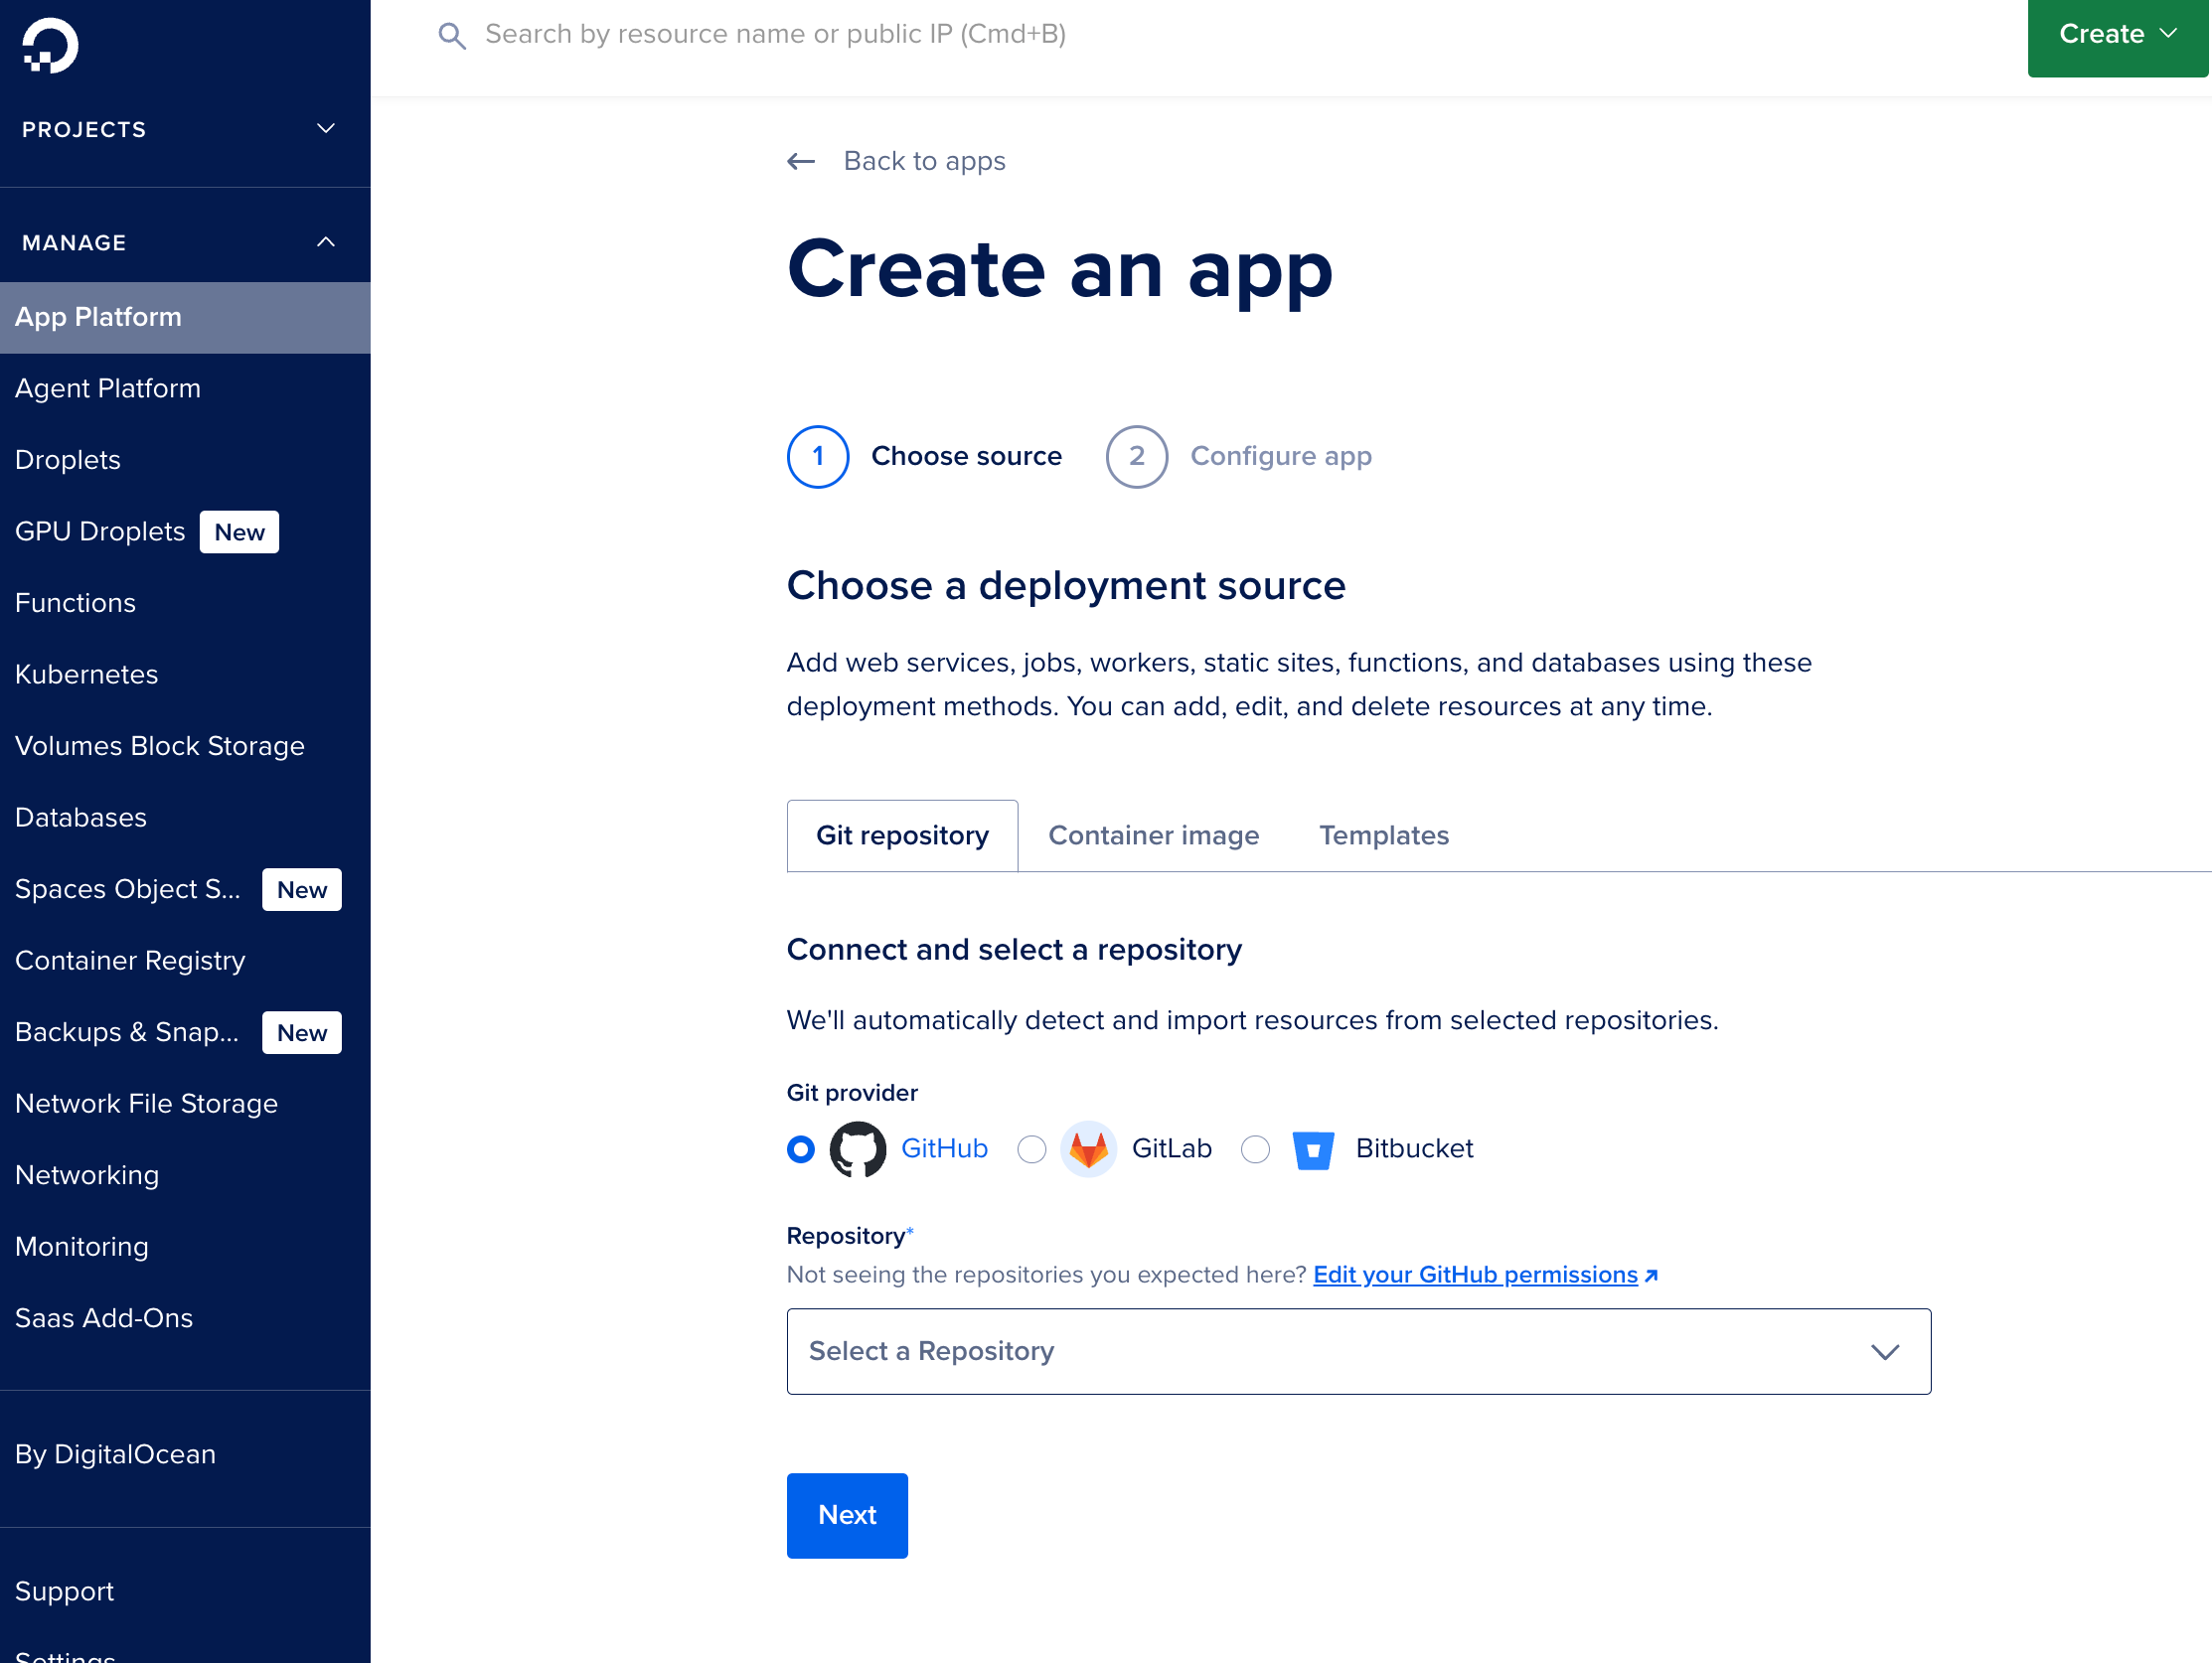
App Platform will detect your
Procfileautomatically and set the run command tobundle exec puma -C config/puma.rb. Leave the build command empty.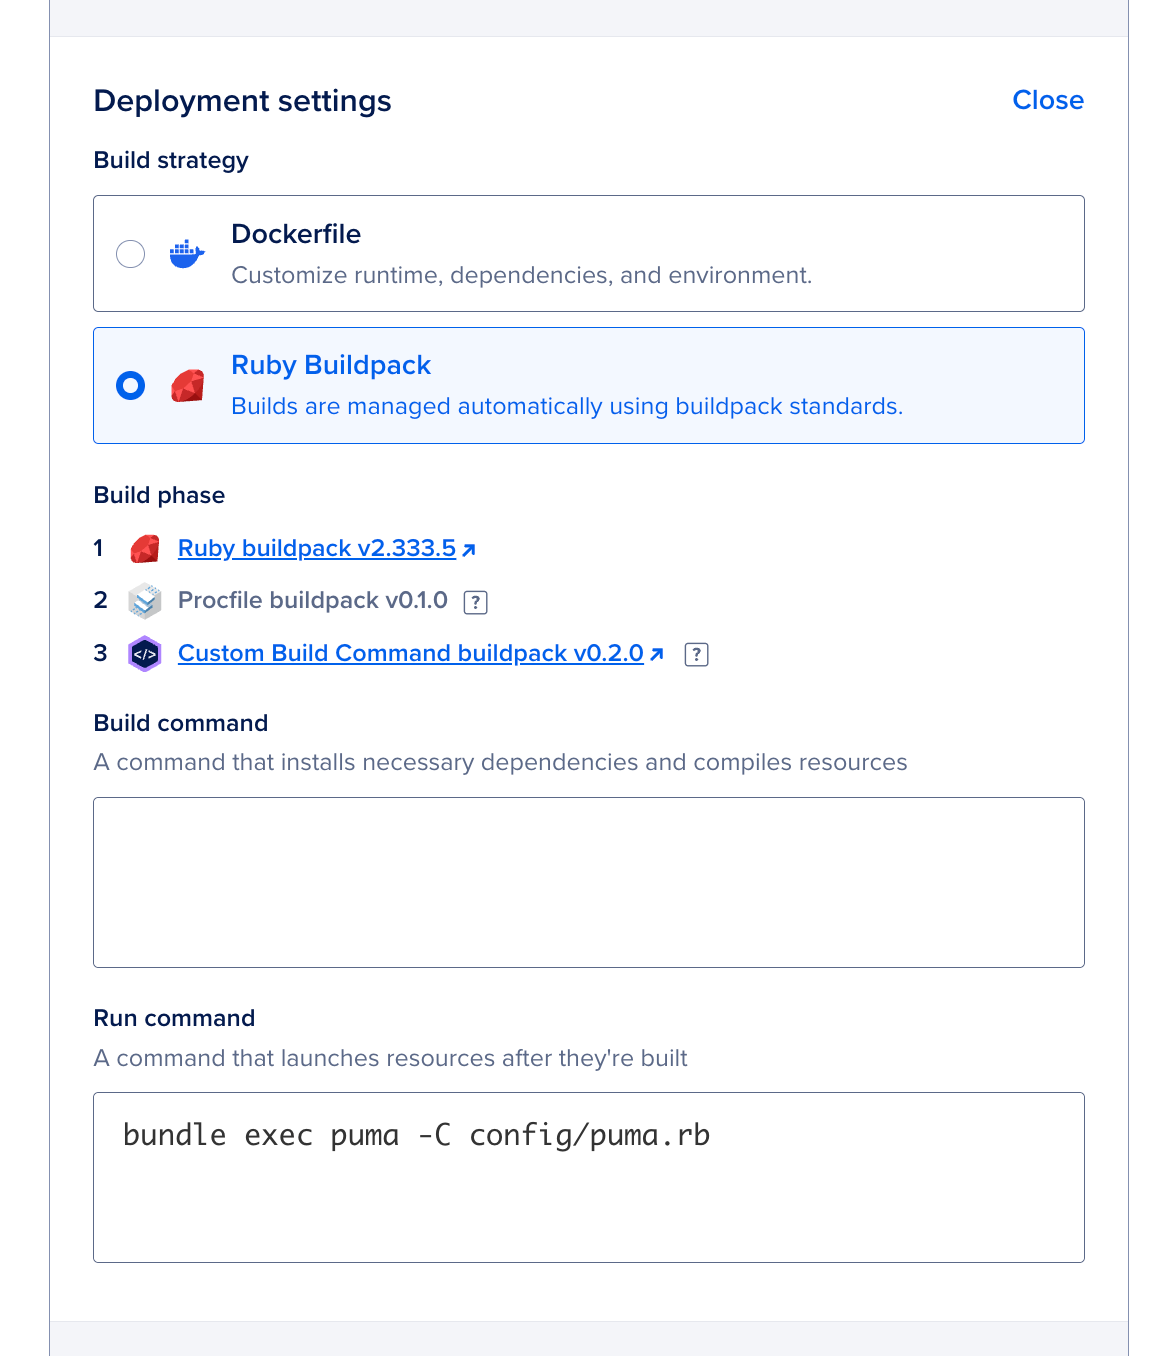
Add a Managed PostgreSQL Database
In the same setup flow, go to the Add a Database tab, add a PostgreSQL database, and create an app.
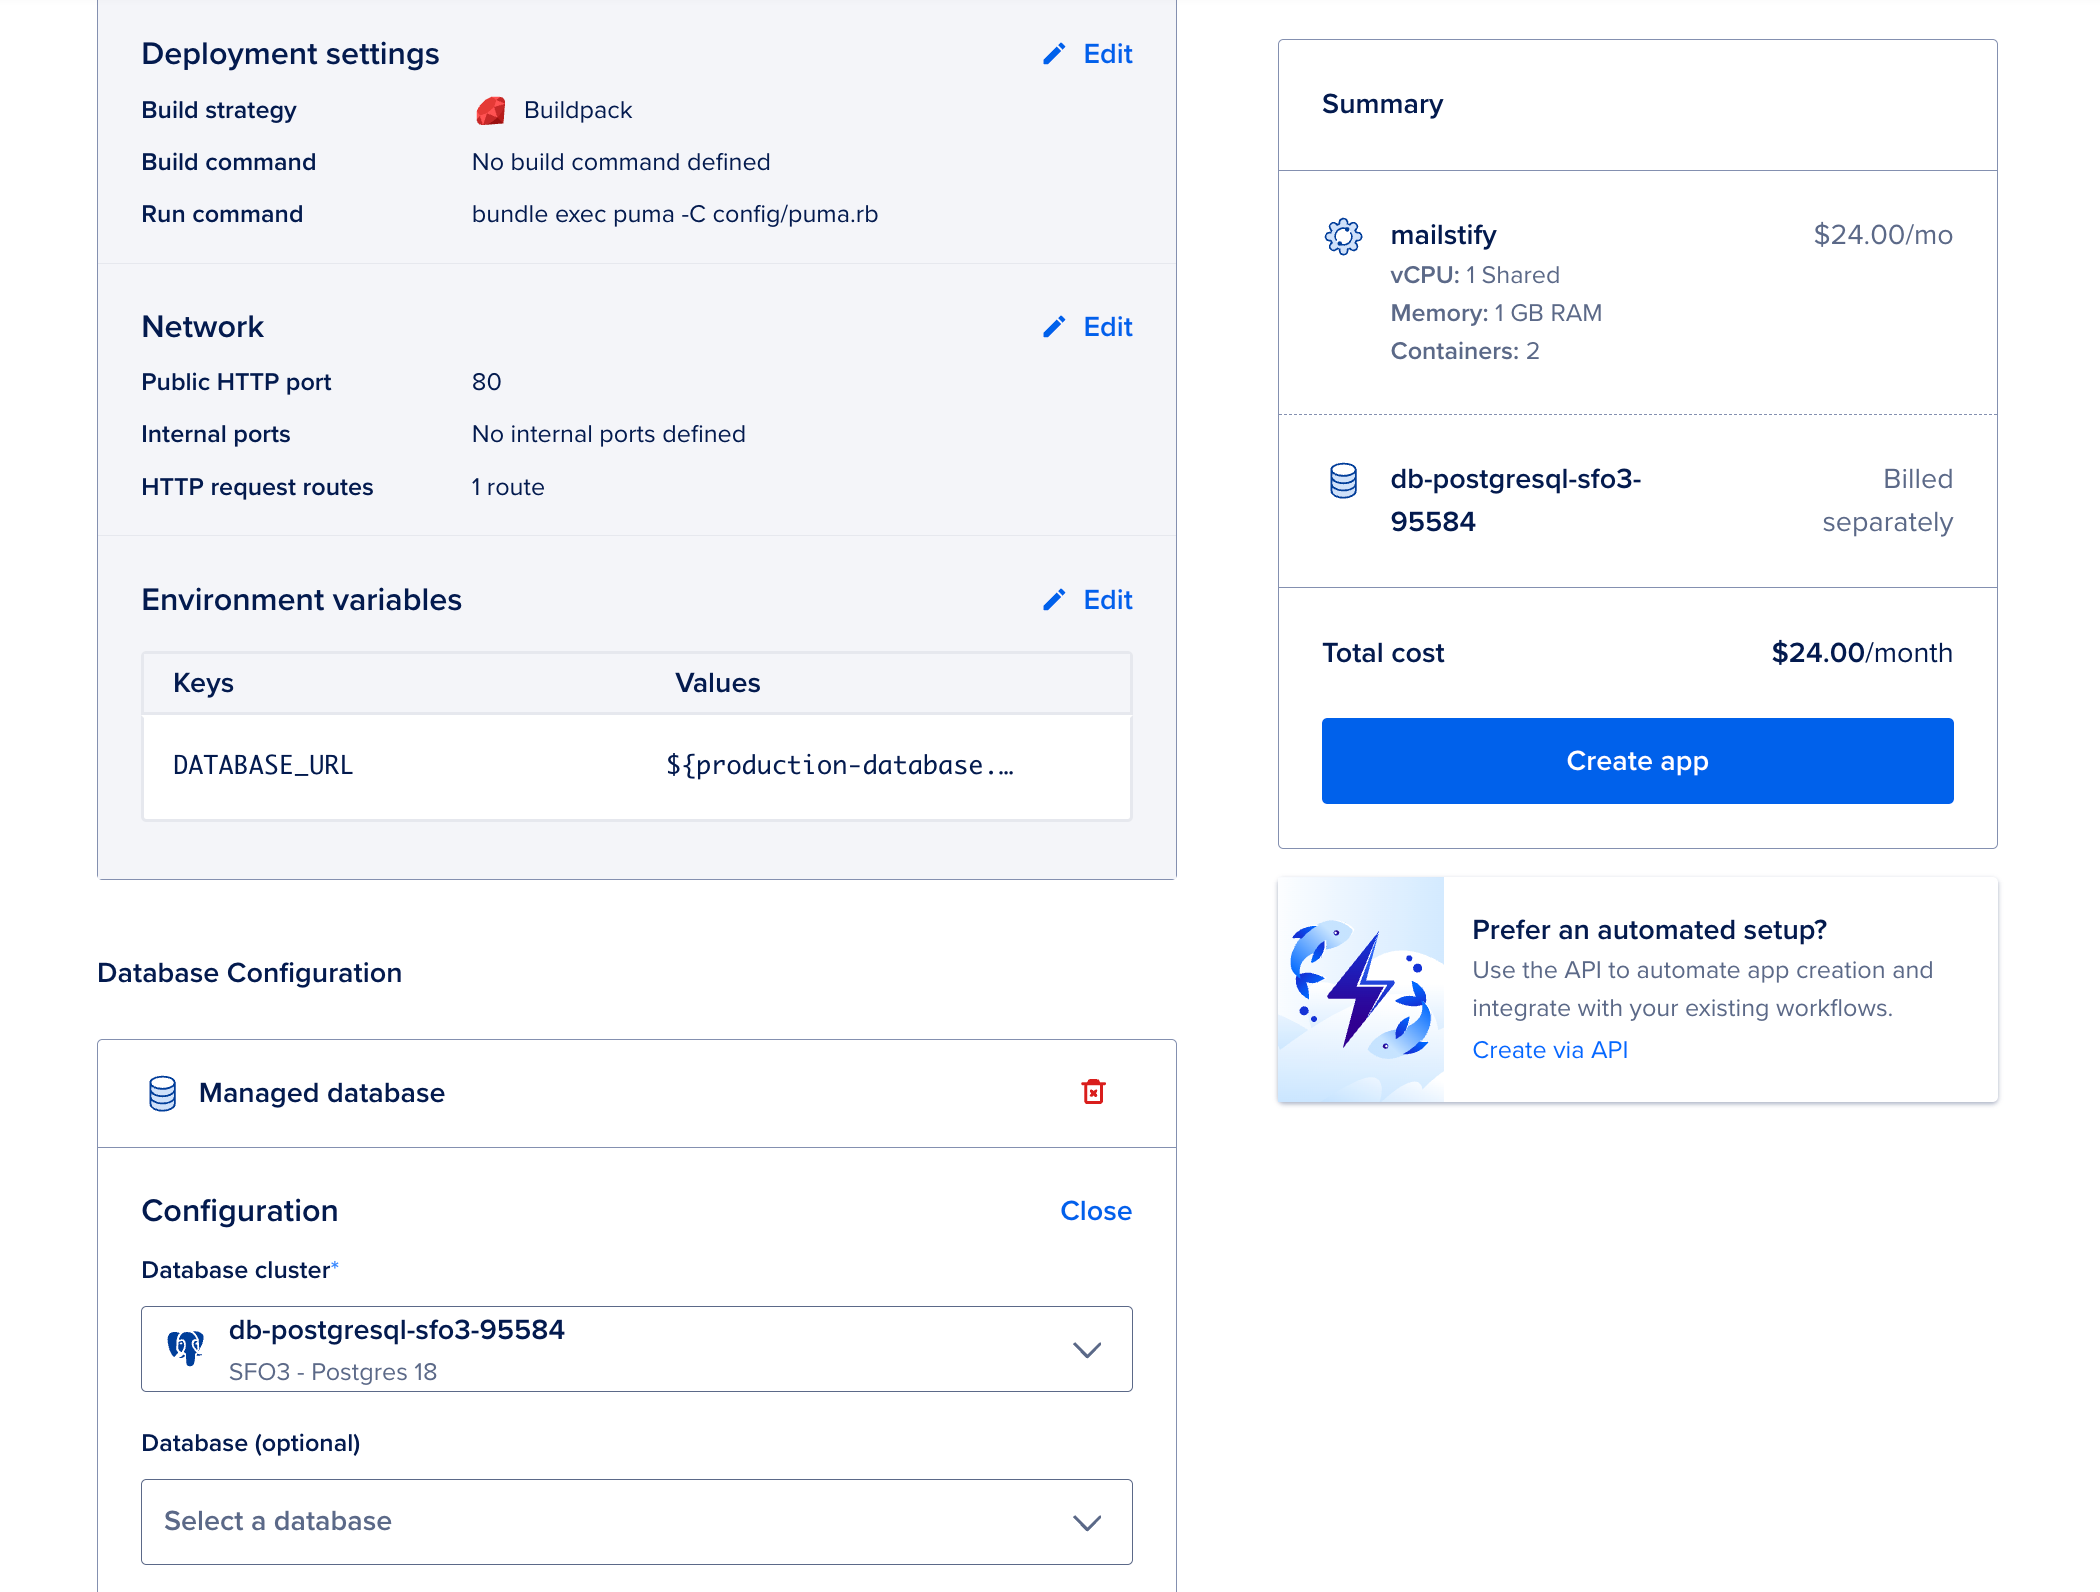
Heads up: After adding the database, DO will show an environment variable reference like
${your-db-name.DATABASE_URL}. This looks like it should work automatically, but in practice, you’ll want to replace it with the actual connection string so Rails and Sidekiq receive a properDATABASE_URL. We'll do that in the next step.Add a Managed Valkey Instance
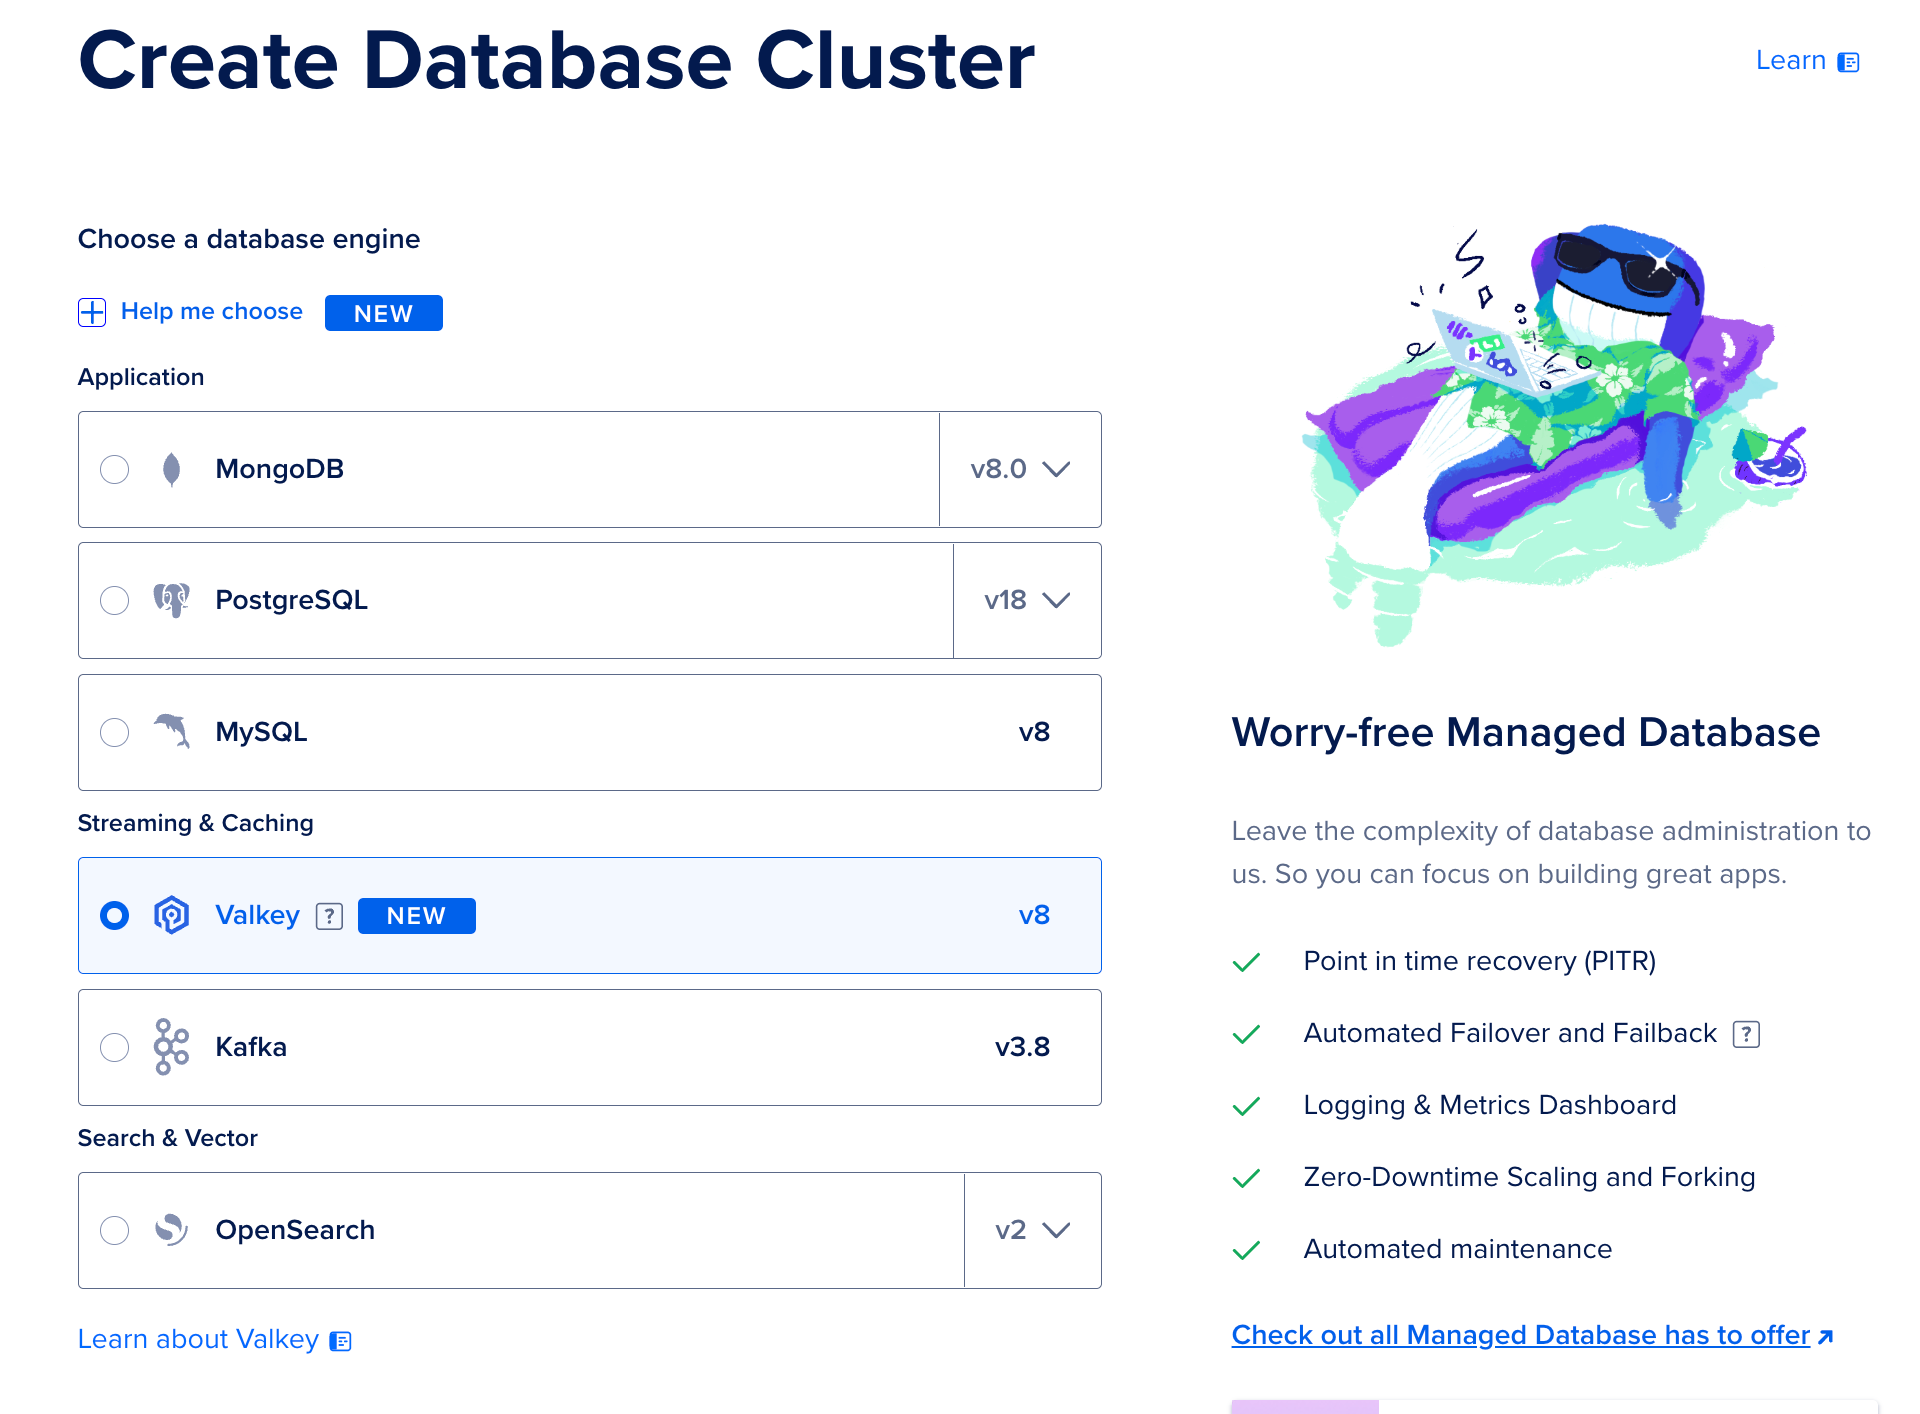
Add a second database and choose Valkey, DigitalOcean's Redis-compatible service. Your app and Sidekiq won't notice the difference.

Set Environment Variables
This is the step that trips people up.
Go to Settings → Environment Variables. You'll see
DATABASE_URLandREDIS_URL(If you set one) set to reference values like${your-db.DATABASE_URL}. Replace both with the actual connection strings.To get the connection strings:
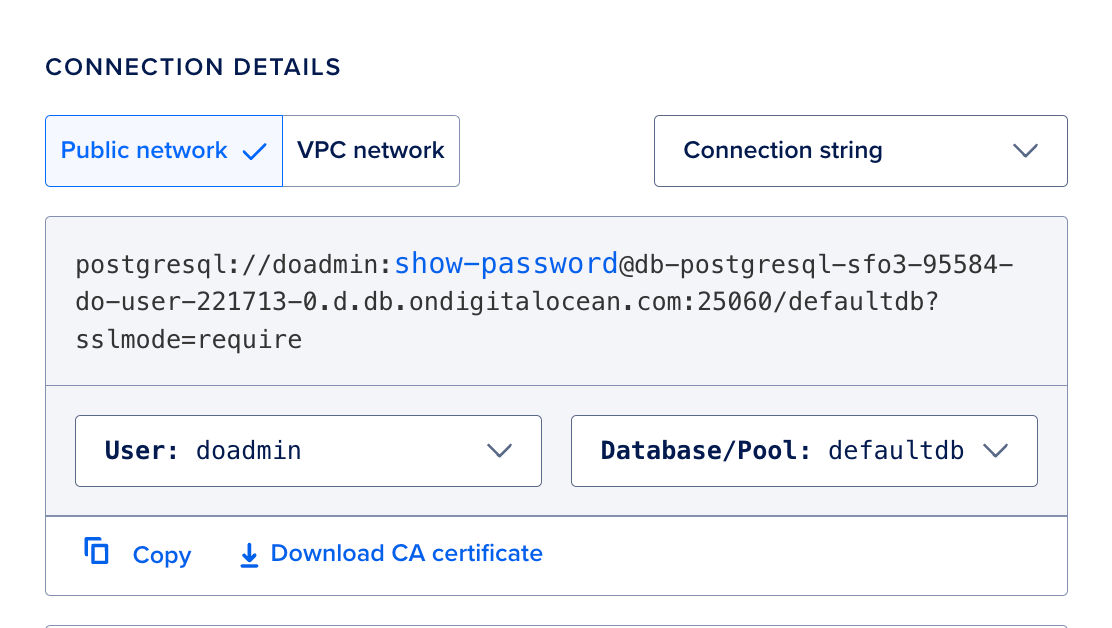
- PostgreSQL: Go to your database → Connection Details → copy the Connection String
- Valkey: Same thing, go to your Valkey instance → Connection Details → copy the connection string
Then add the rest of your environment variables from Heroku (
RAILS_MASTER_KEY, any API keys, etc.).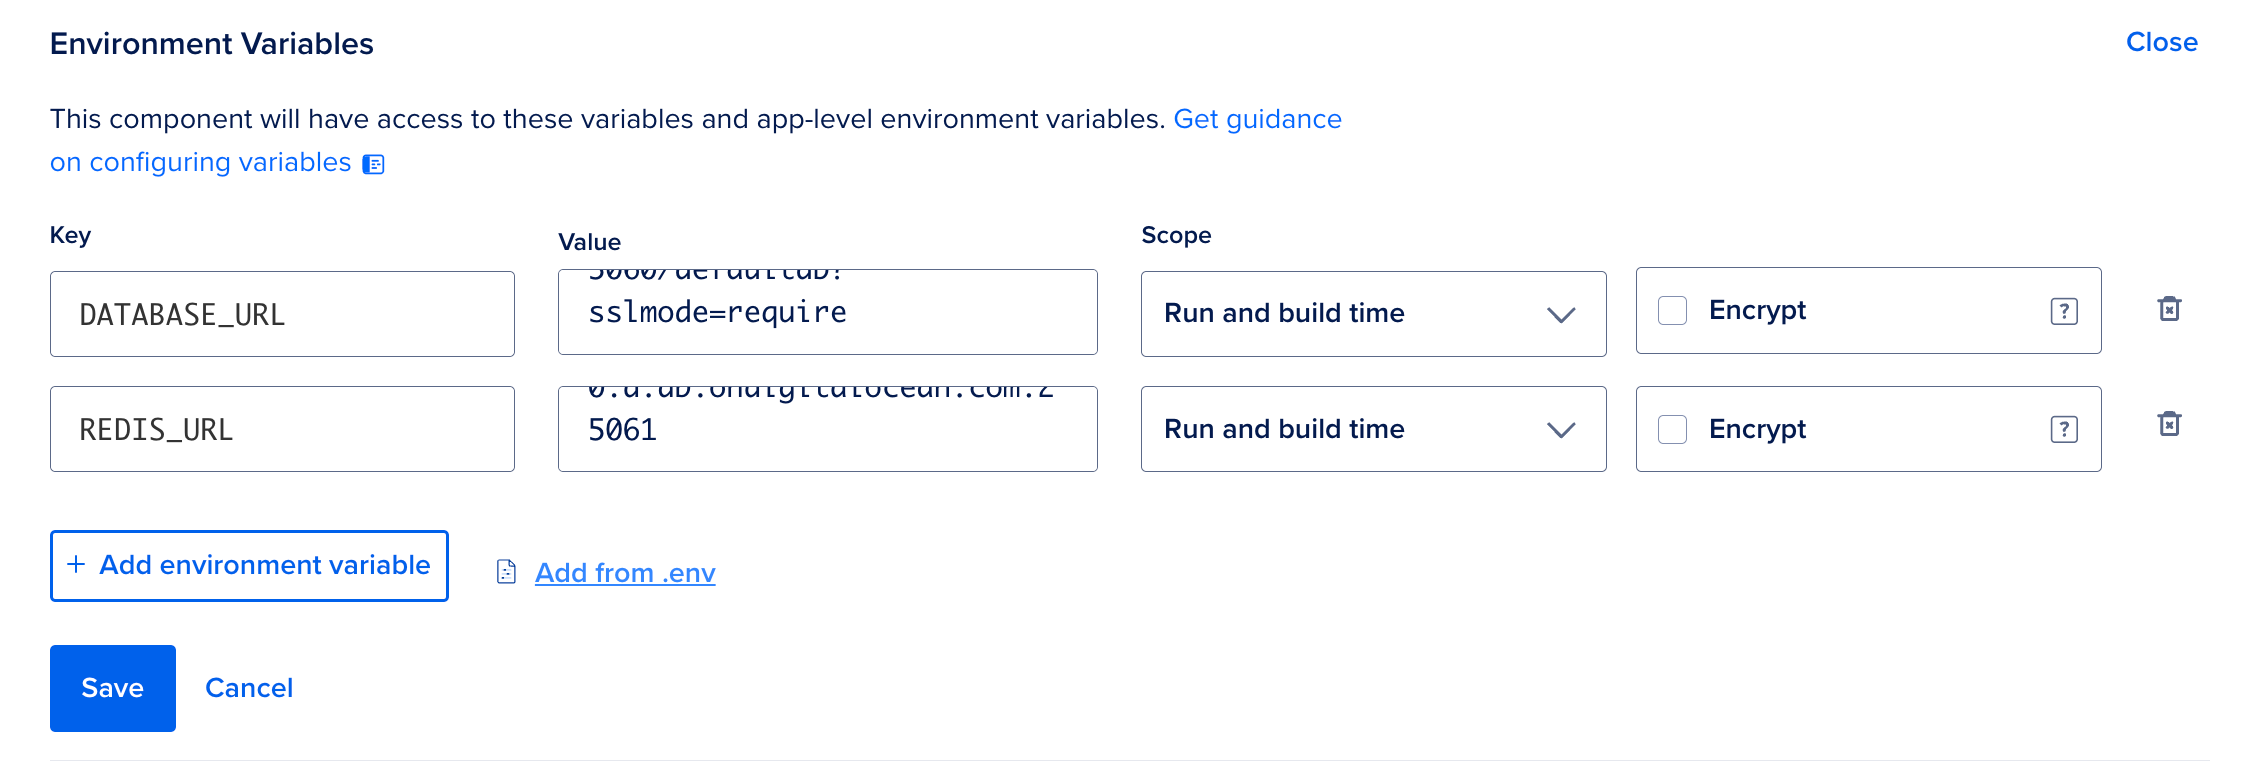
Restore Your Database
Before you deploy, restore your data. If you deploy first, your app will 500 on every request until the database is ready. Run this from your local machine using the connection details from your new PostgreSQL database:
PGPASSWORD=your_password pg_restore \\
  -U doadmin \\
  -h your-db-host.db.ondigitalocean.com \\
  -p 25060 \\
  -d defaultdb \\
  latest.dump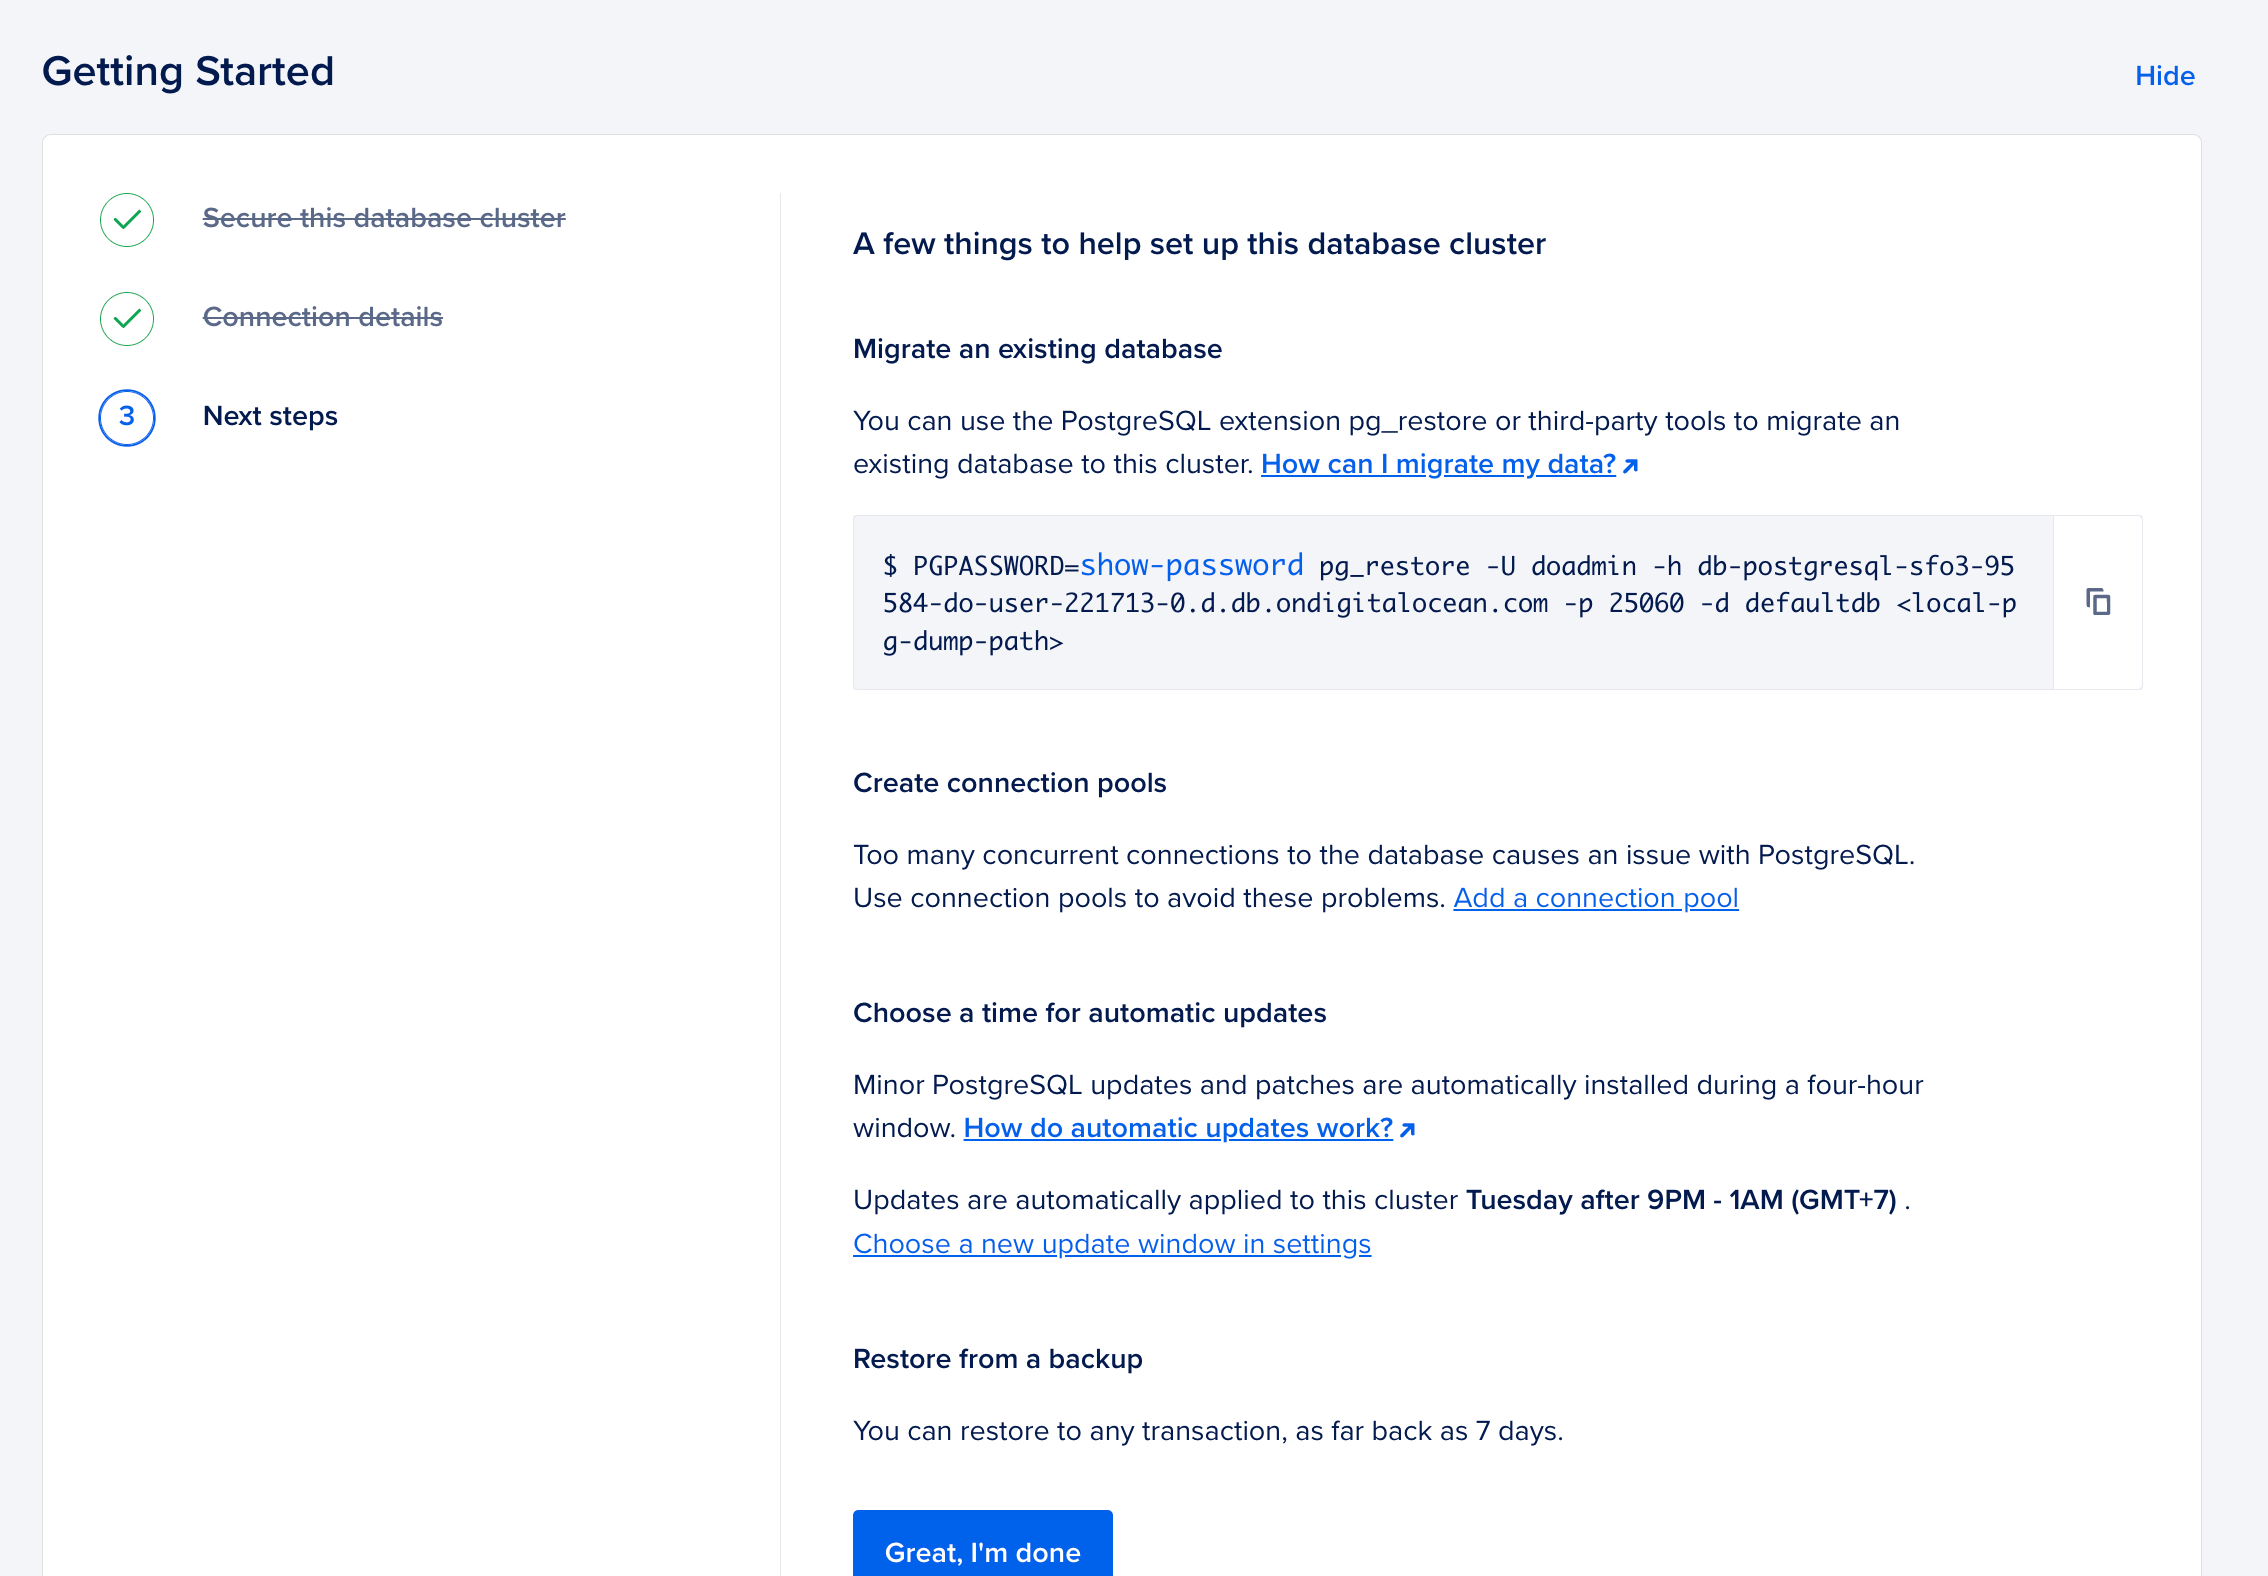
If you're starting fresh with no existing data, skip this and just run migrations after deploying instead.
Deploy
Deploy your app. Once it's live, if you skipped the restore above, open the web console and run:
rails db:migrate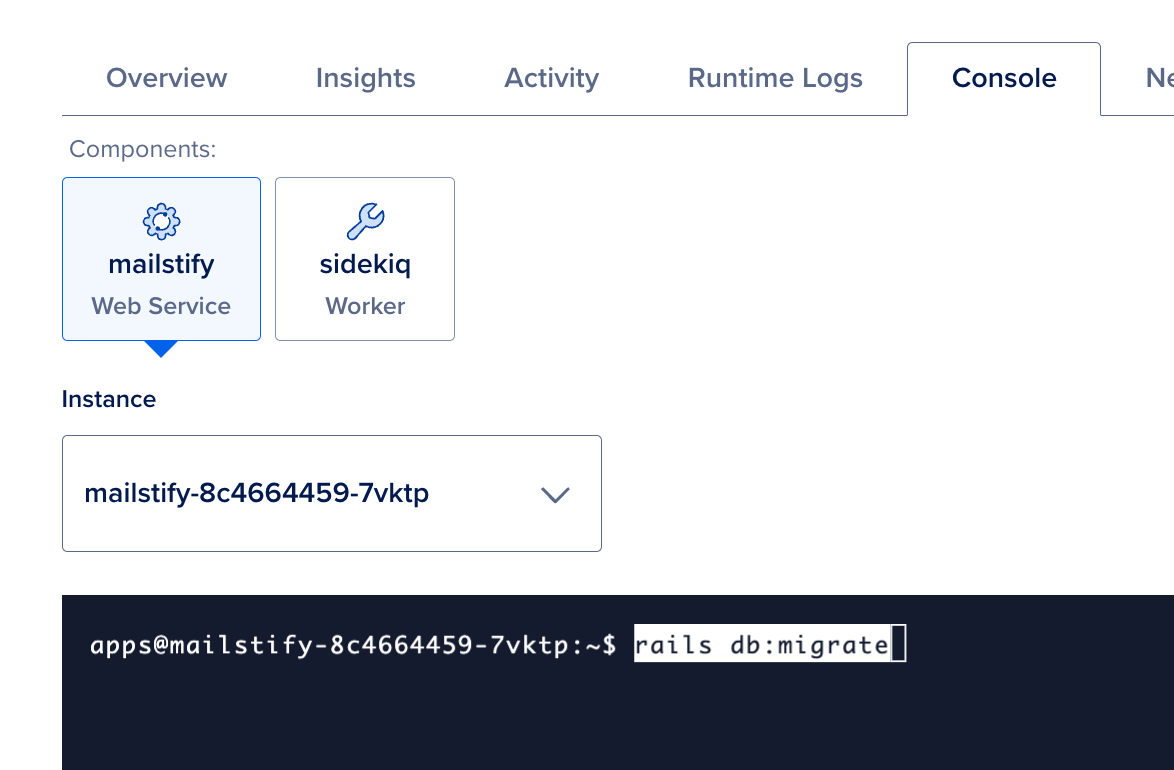
Add Sidekiq as a Worker Component
Sidekiq needs to run as a separate component so it has its own process and can be scaled or restarted independently from your web server. In DO App Platform, go to your app and create a new worker component:
- Resource type: Worker
- Run command:
bundle exec sidekiq - Environment variables: Make sure
DATABASE_URLandREDIS_URLare set here too. The worker needs both
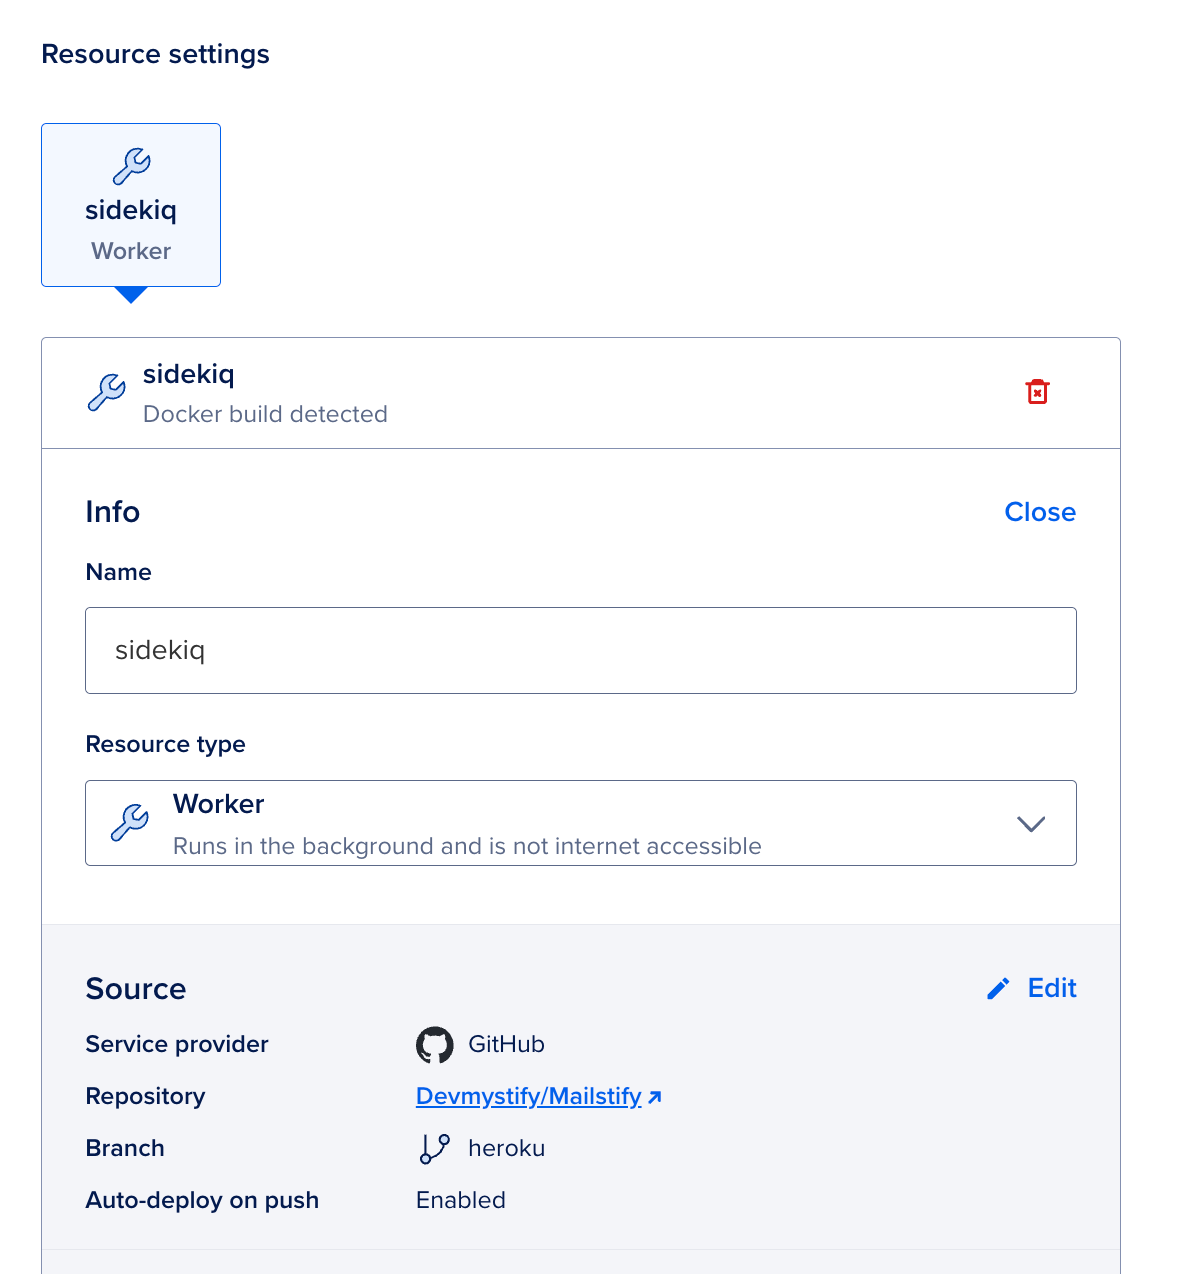
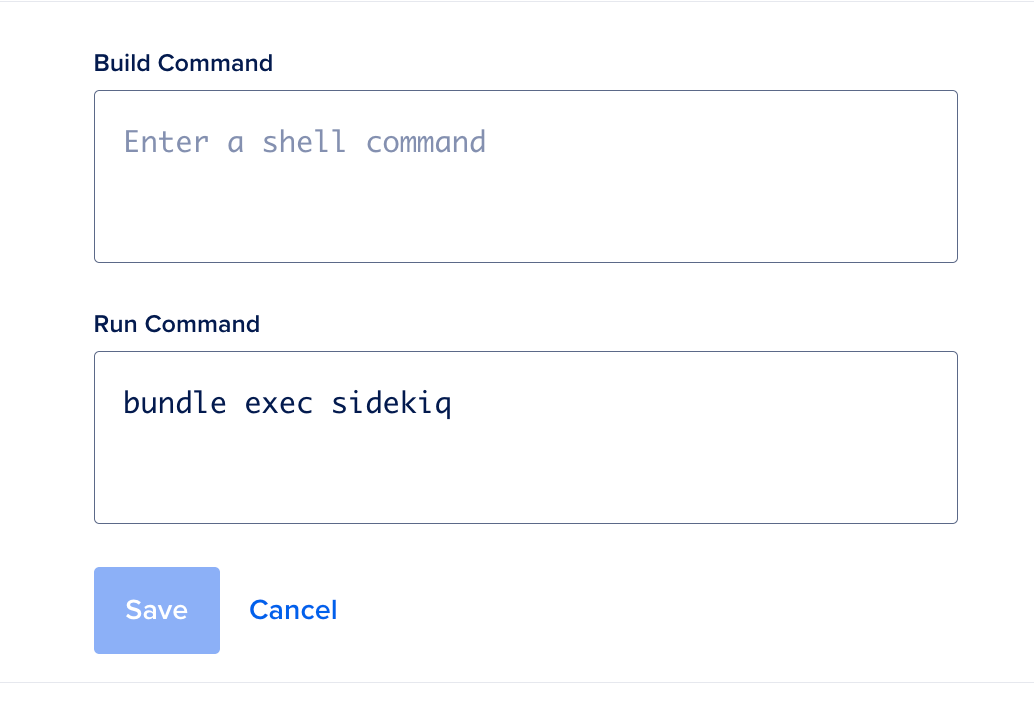
Deploy the worker. Check the runtime logs, you should see Sidekiq boot up and connect to Valkey.

Note: Running a separate worker component means paying for an additional instance. For low-traffic apps, you can start without it and add the worker only when you have actual background jobs that need processing.
Recreate Your CRON Jobs
DigitalOcean App Platform handles scheduled tasks as Job components, configured the same way as the worker above but with a schedule attached. Follow the official guide here:
https://docs.digitalocean.com/products/app-platform/how-to/manage-jobs/
Point Your Domain to DigitalOcean
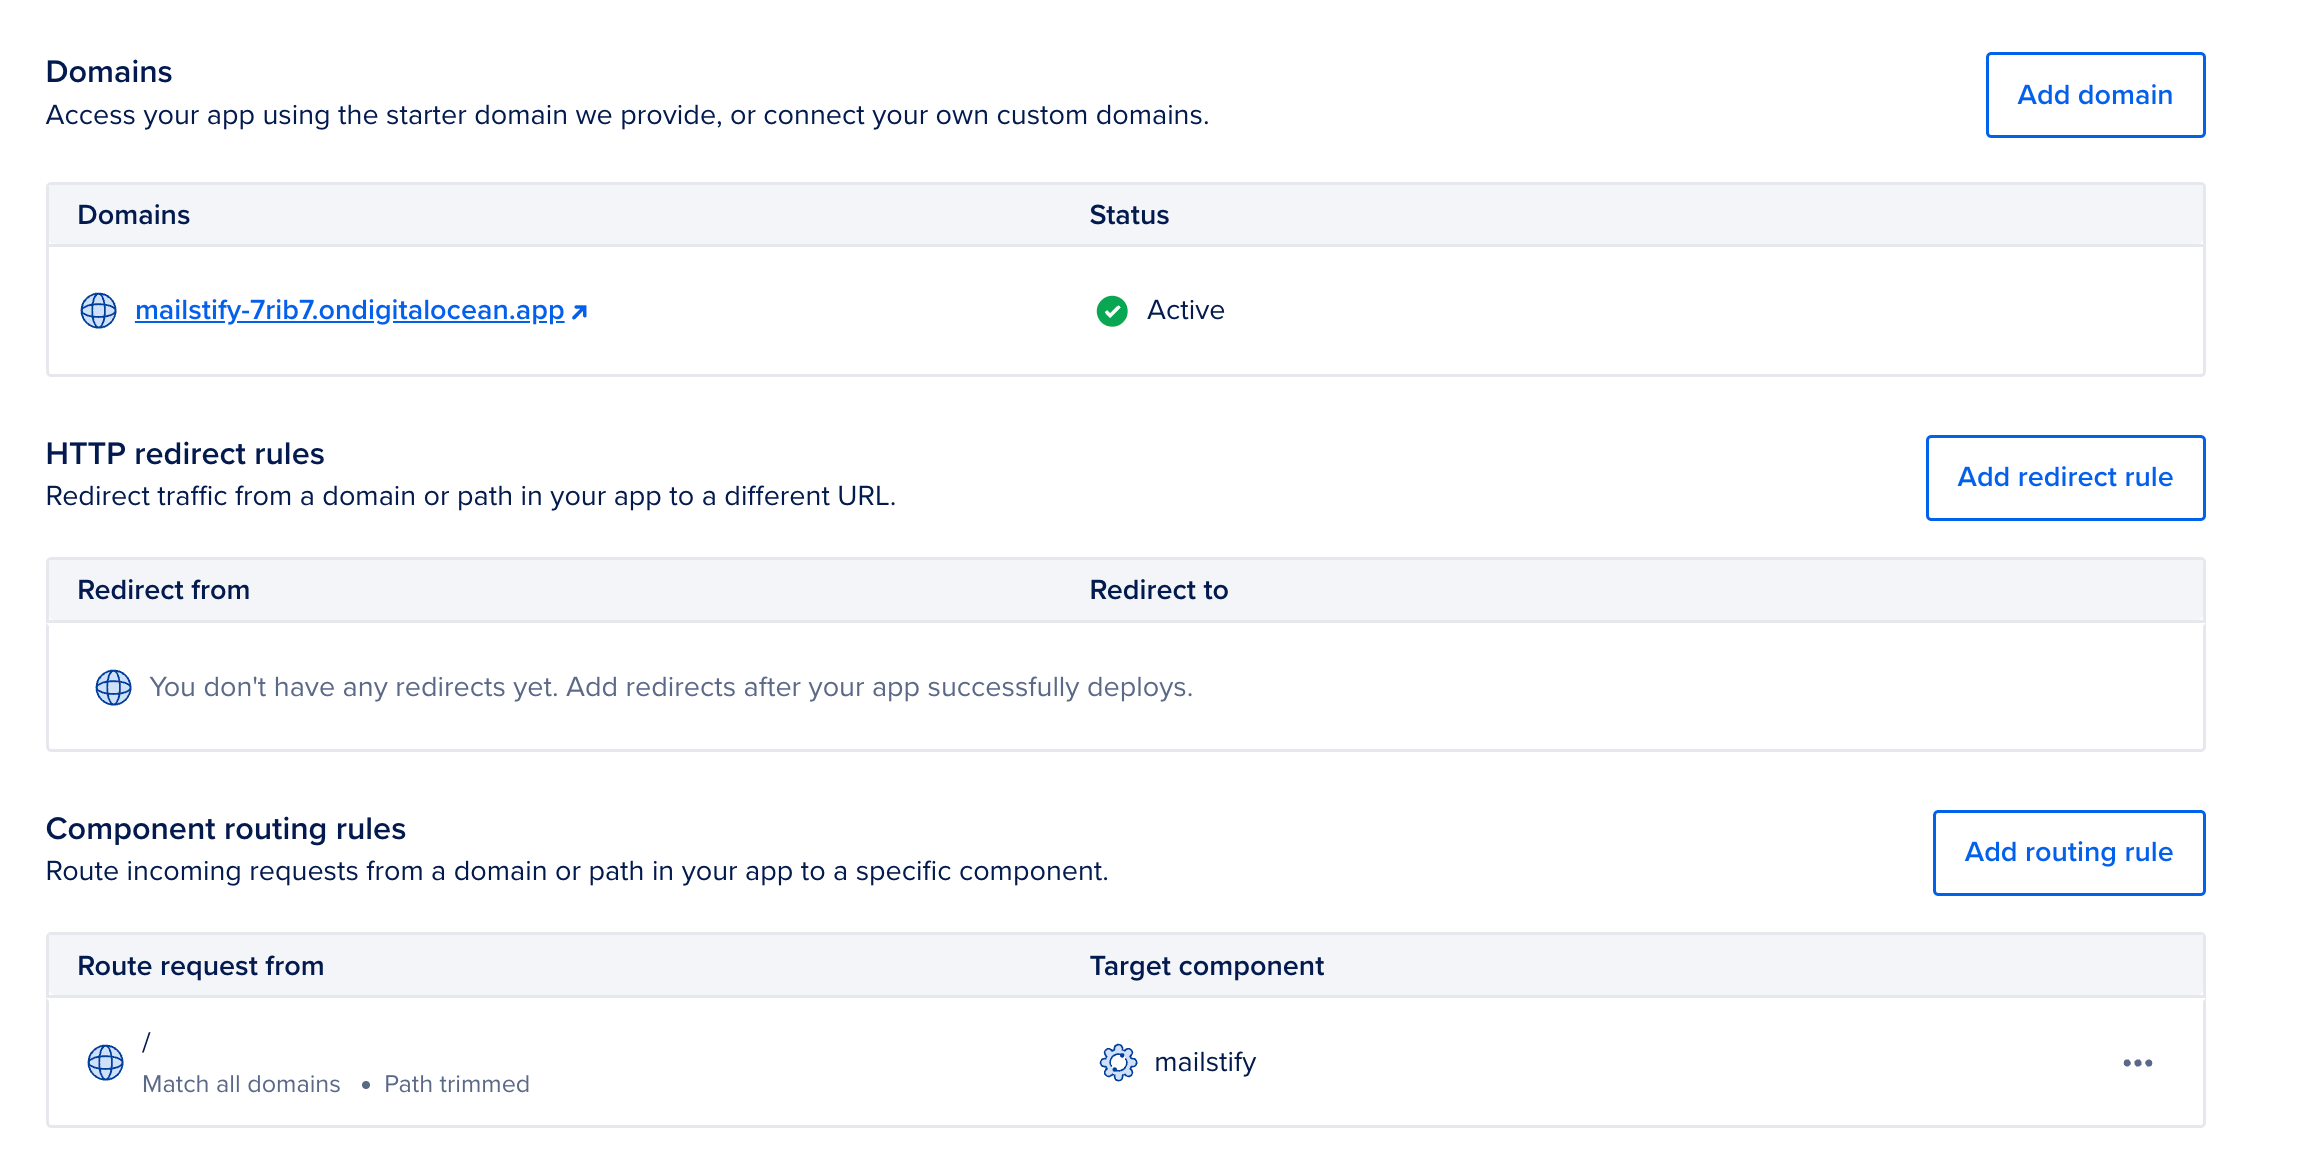
Once your app is deployed, you can connect your custom domain.
In App Platform, go to Settings → Domains and click Add domain.
DigitalOcean will show you the DNS record you need to configure. Add that record at your DNS provider (or inside DigitalOcean DNS if you’re using it).
After DNS propagates, App Platform will automatically provision SSL for your domain .
If you want the full step-by-step walkthrough, DigitalOcean has an official guide here .
You're Live
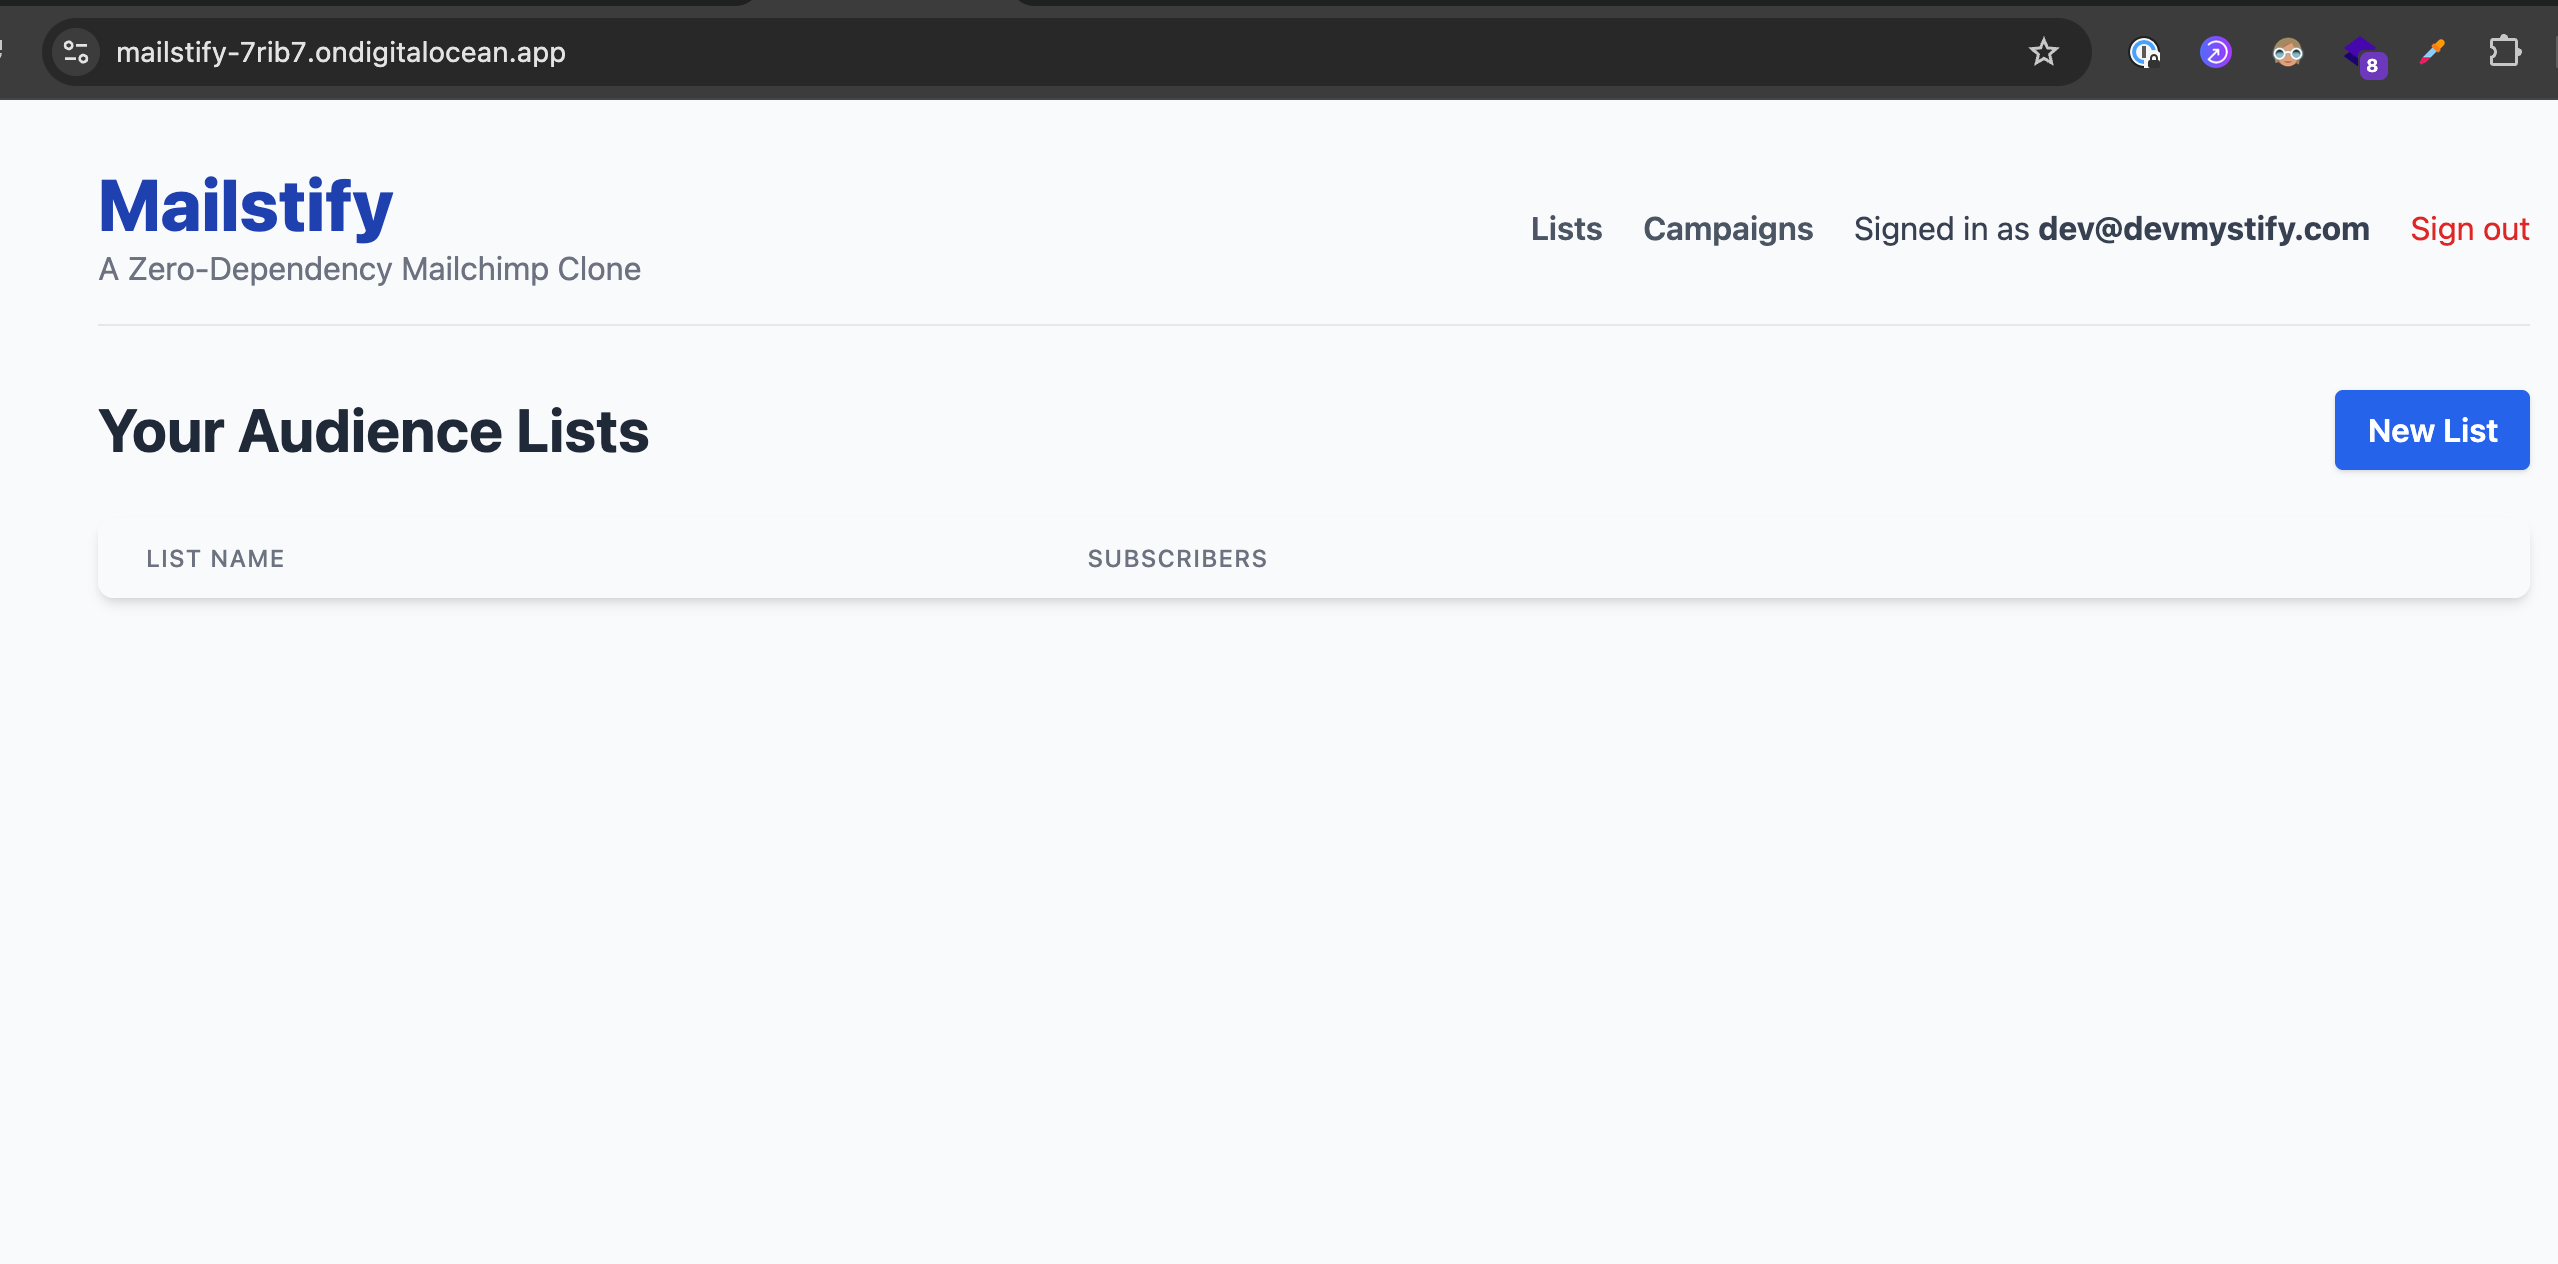
Once everything is running, confirm traffic is flowing to DigitalOcean and monitor the app for any unexpected issues.
You can run both environments in parallel for a day to be safe. When you're confident everything is stable, remove the Heroku app.
Heroku isn't going away tomorrow, but it's no longer moving forward either. DigitalOcean App Platform gives you the same push-to-deploy simplicity with a platform that's still actively growing.
Get started on DigitalOcean with $200 credit today.

